How to Edit a PDF on Mac
Editing PDFs on a Mac might seem daunting to some, but fear not – it is as simple as it is to crop a screenshot on Mac! Whether it is correcting typos, adding annotations, or simply filling out a form, your Mac offers you friendly tools like Quick Look and Finder, which you can use to modify your PDF documents to perfection effortlessly. This post details everything you need to know how to edit a PDF on Mac.
Table of Contents
How to Edit PDF on Mac Using Preview
- In the Finder window, find the PDF you want to edit and double-click it. The PDF file will automatically open in Preview.
- If in case, Preview does not open, right-click on the PDF file, then click Open with -> Preview.
- Here, click on the Pencil icon available in the top toolbar.
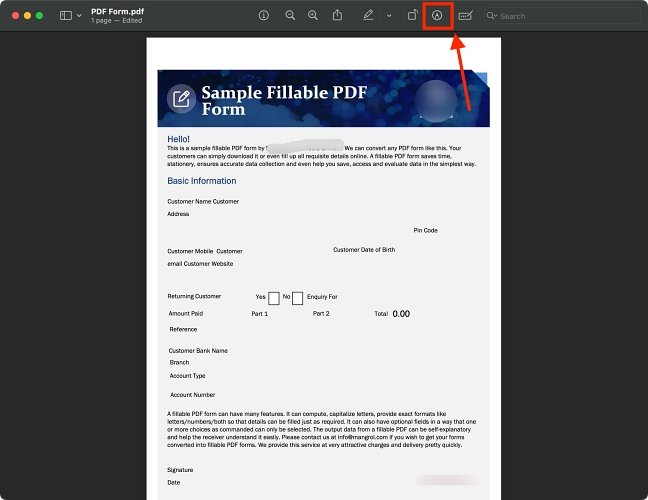
- Now, all the available PDF editing tools will appear at the top of the PDF document.
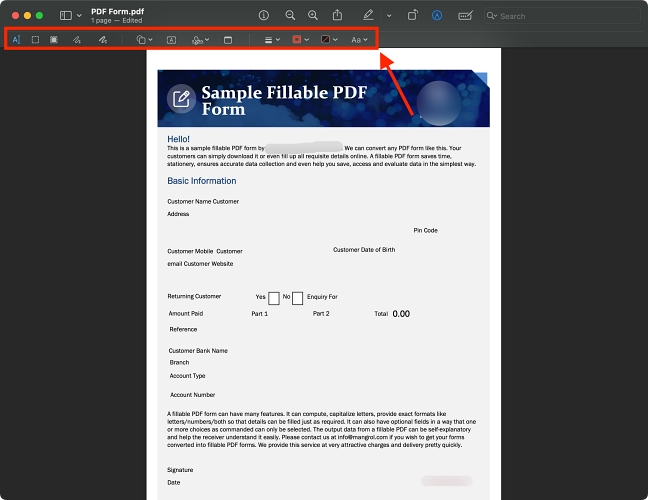
We will cover each available editing tool in detail in the later sections.
How to Edit PDF on Mac Using Quick Look
- In the Finder window, select the PDF file you want to edit and hit the Space Bar on your Keyboard, and a quick preview of the PDF will appear.
- Here, to begin editing, click the Pencil icon at the top center.
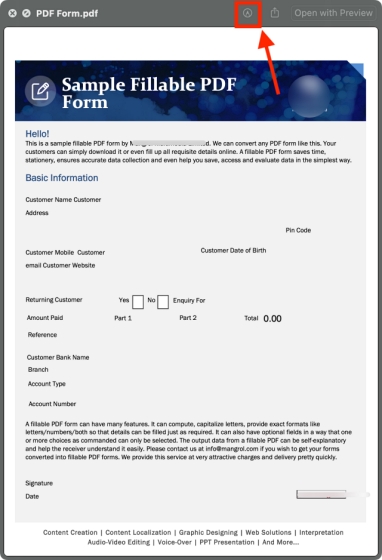
- Now, all the available PDF editing tools will appear at the top.
The editing process in both the programs (Finder and Quick Look ) is exactly the same. Both programs offer you the same set of editing tools, including but not limited to the ability to add texts, shapes, and signatures to the previewed PDF file. With the basics out, here’s how you can add elements to the previewed PDF file on your Mac:
How to Add Text in a PDF on Mac
- To add text to the PDF, click the Text tool represented by A in a box in the toolbar.
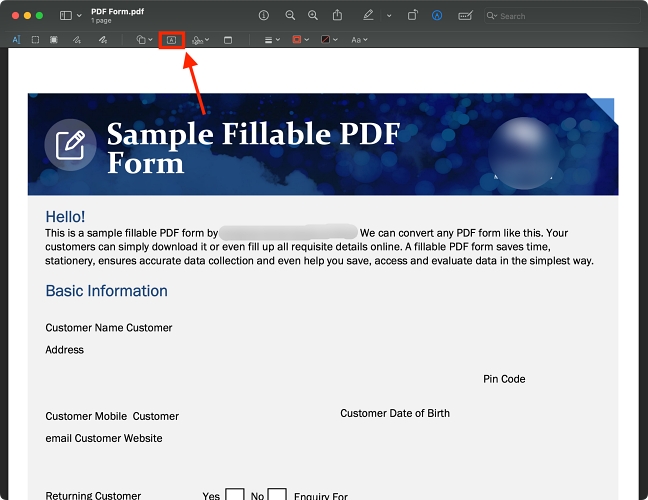
- Now, a word Text will appear on your screen, select the text and enter your desired text.
- By default, the color of the text you add is red. To change the text color, click the aA icon at the top, then click the Red box and choose your desired color.

- To change the font style of the text, again click the aA, then click the up-down Arrow icon next to the font style name and choose the desired font from the drop-down menu.
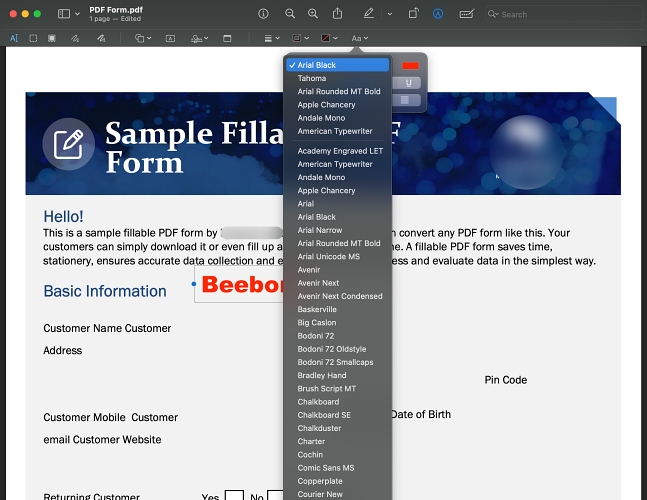
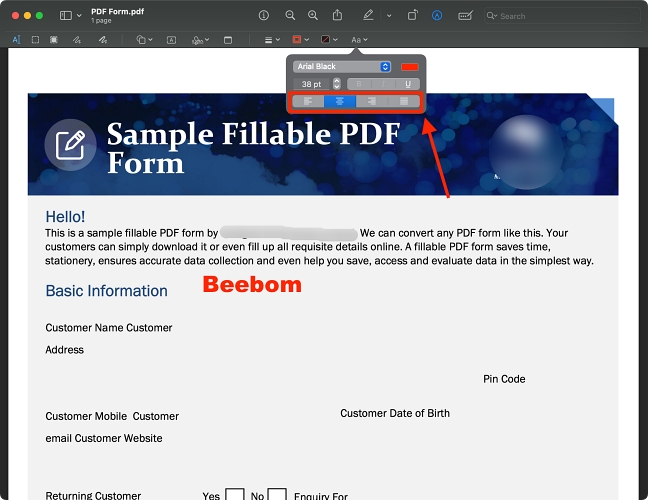
- You can also change the font size by clicking the Up and Down arrow next to the size or by clicking the size and entering it manually.
- The same menu box also allows you to change the text alignment.
- Once you are okay with the text style and size, click and hold the text, then use your mouse to movethe text anywhere on the PDF file.
Related Articles
Arjun Sha Oct 31, 2023
Vikhyat Rishi Nov 2, 2023
Satyam Kumar Nov 30, 2023
How to Add Signature in a PDF on Mac
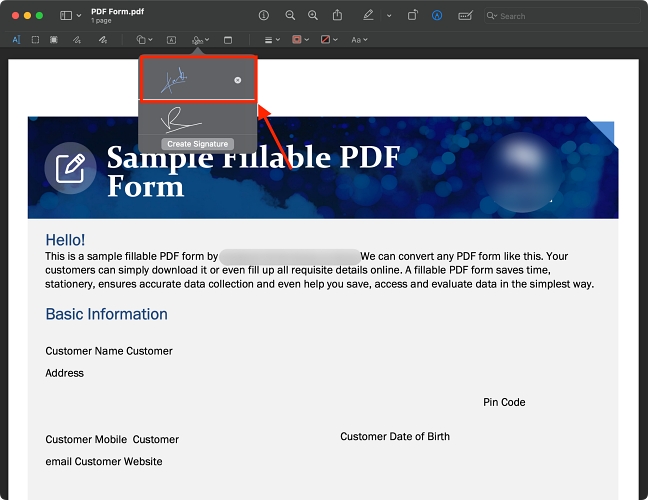
- To add a signature to your PDF document, click the Signature icon in the toolbar, then choose a Signature from the list that appears.
- If you want to add a new signature, click the Create Signature button at the bottom.
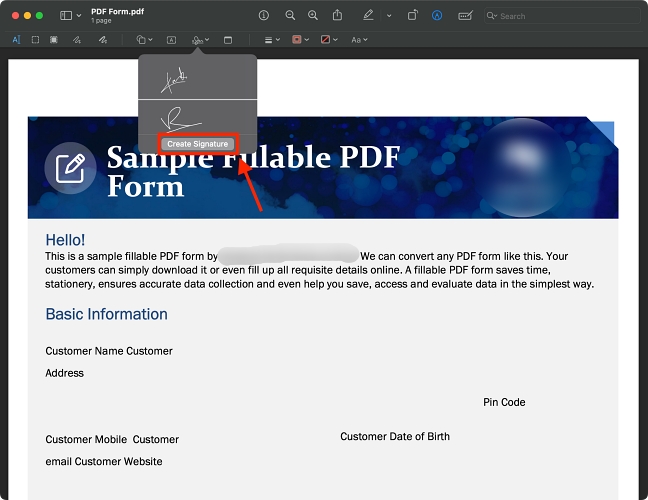
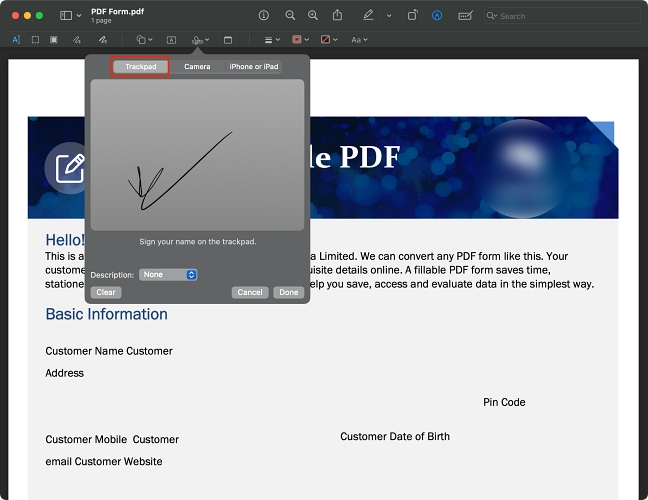
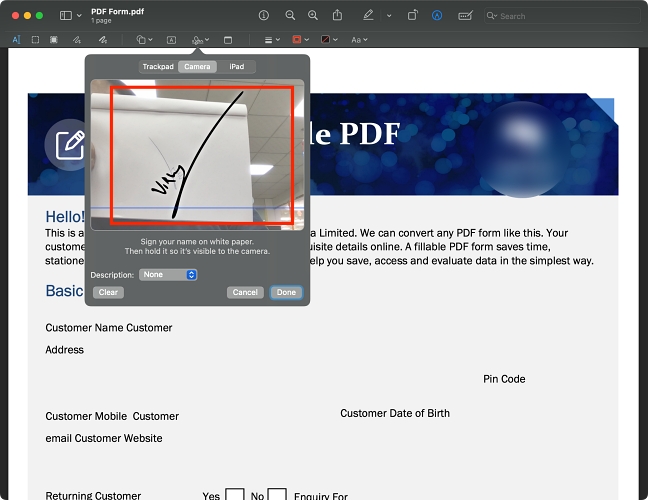
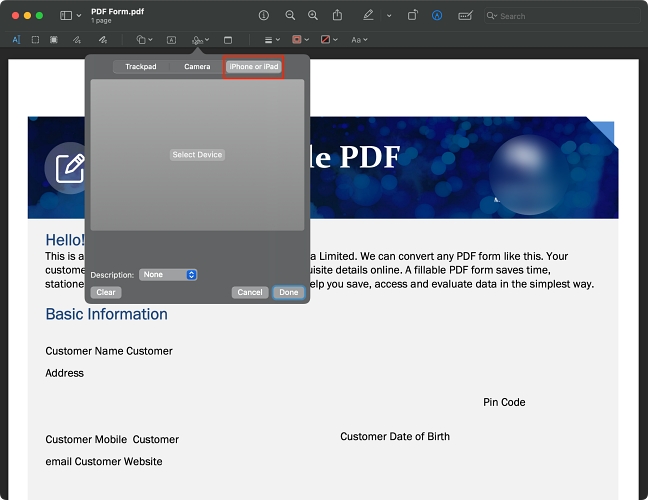
- Now, you will get three different options to add a new signature –
- Click the Trackpad button and use your finger or stylus to make your signature on the Mac’s trackpad.
2. Click the Camera button and hold a blank piece of paper with your signature in front of your Mac’s camera so the Mac can scan your signature.
3. Click the iPhone or iPad button, and you will be prompted to use either device’s (signed in with the same Apple ID as on your Mac) screen to write your signature.
How to Add Shapes to a PDF on Mac
- To add shapes to the PDF file, click the Shapes icon (an overlapping circle and square), then choose the shape you want to add from the drop-down menu, whether a square, curved-corner square, circle, speech bubble, star, or hexagon.
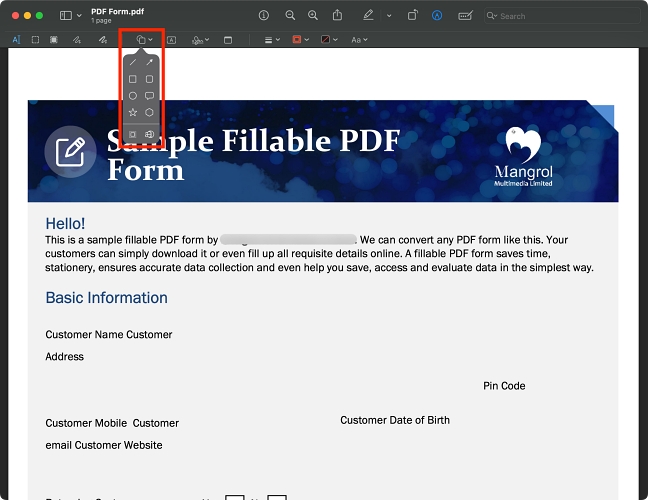
- Once done, you can adjust the size and structure of the added shape by dragging the dots on either side of the shape.
- To adjust the thickness of the shape’s edges, click the multi-ine icon in the top menu, then choose an option from the drop-down list that appears.
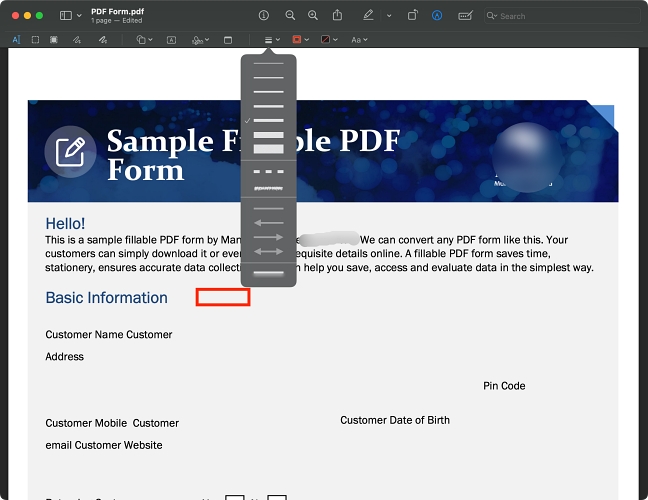
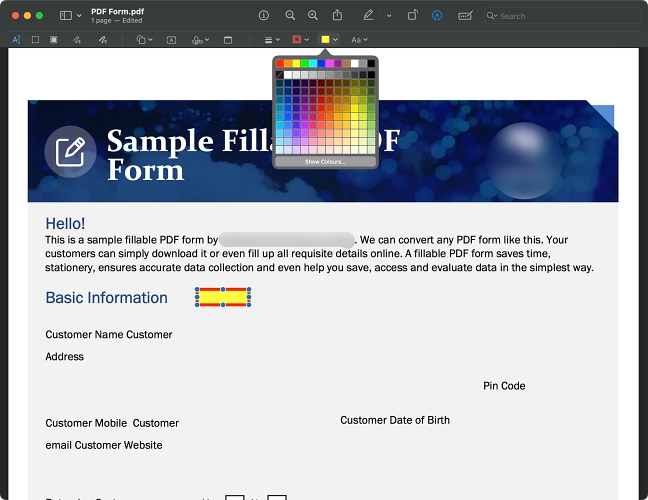
- To alter the border color of the added shape, click the outline color tool at the top and choose the desired color.

- You can also choose to fill color in the shape by using the color tool available at the top.
How to Rearrange PDF Pages on Mac
- Click on the icon on the left side of the name of the pdf file at the top to open a drop-down menu.
- Here, click on the Thumbnails option.
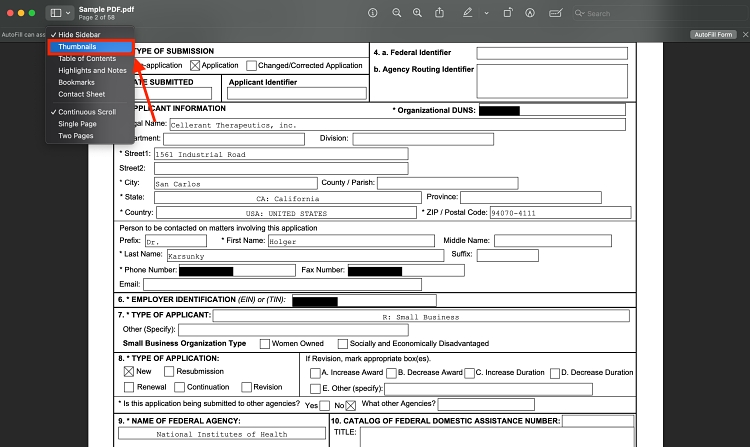
- Now, all the pages of the PDF file will appear on the left side of the Preview window as Thumbnails.
- To rearrange the pages of the PDF file, click and drag the individual PDF file page’s thumbnail up or down.
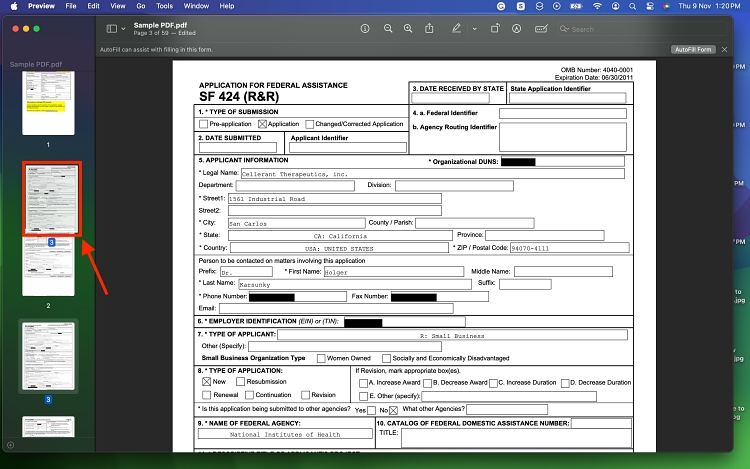
- To delete a page from the PDF file, click the Page Thumbnail and press the Delete button on your Mac’s keyboard.
Use a Third-Party App to Edit PDFs on Mac
There are several excellent PDF editors available for Mac users. Some popular options include Adobe Acrobat DC, PDF Expert, and Foxit PhantomPDF. The best choice depends on your specific needs, such as basic editing, advanced features, or budget constraints. It’s always a good idea to compare their features and pricing to find the one that suits your needs the best. In our testing, we found that Adobe Acrobat PDF software (free trial) can do pretty much everything one can expect from a PDF editor.
Related Articles
Vikhyat Rishi Nov 6, 2023
Vikhyat Rishi Oct 26, 2023
Kanika Gogia Oct 26, 2023
Also, Adobe Acrobat PDF software is the go-to choice for many professionals out there. It offers a comprehensive set of features, including text and image editing, form creation, and digital signatures. While it comes with a price tag, its robust capabilities make it worth considering for users who require advanced editing tools and collaboration features.
And that’s it; this is how you edit a PDF on Mac. Whether you opt for the simplicity of the Preview and Quick Look or any other specialized third-party solution, editing PDFs on your Mac has never been more convenient. With these tools at your disposal, you can confidently handle any PDF editing task that comes your way. Now that you know how to edit a PDF on Mac, also check how to edit a PDF on Windows.
Vikhyat Rishi
Vikhyat has a bachelor's degree in Electronic and Communication Engineering and over five years of writing experience. His passion for technology and Apple products led him to Beebom, where he specializes in writing App features, How To's and app troubleshooting guides for fellow Apple users. When not typing away on his MacBook Pro, he loves exploring the real world.


